That's right, I've got another Monster High doll finished!

This particular doll was a very worn Purrsephone. Her hair was truly awful and her left lower arm and hand were missing and had been replaced with sparkly blue parts from an Abbey Bominable doll.
 Her right hand was also missing, but I managed to find one that matched her in my parts bin.
Here she is post-wash. Not much better.

The first step, of course, was to chop off her sticky, tangled hair and take off her face with 100% acetone nail polish remover.

Here's a closeup of the replaced hand. To prep for painting, I sanded the bumpy glitter off and sprayed the hand and arm with matte sealer.
 I also removed the white stripes on her body with nail polish remover. However, the acetone slightly damaged the hard plastic, so I had to sand, seal and paint there as well.
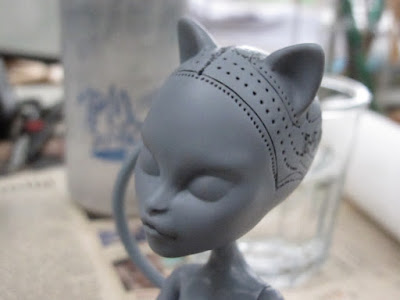
Next, I pulled out the leftover hair plugs from inside her head, and removed the black scalp paint. She looks much better!
 After some deliberation, I decided that Purrsephone should have an edgy, punky look, to contrast her sister, the more feminine Meowlody doll I posted about earlier.
And what's more punk than a mohawk? I picked out some long, black, faux-fur fabric to play around with.

The first part, of course, is the long hair that goes down the middle of the head. I cut a long strip of fur fabric with the fur running backwards, and made a point at one end for a widow's peak hairline.

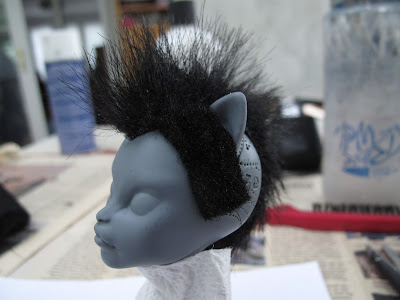
Then, I just superglued it onto her head. Perfect insta-mohawk, no gel required.

For the shorter, buzz-cut hair on the rest of her head, I used the same fabric, but cut the fur down shorter.
In order to work around her kitty ears, I first made two rectangles to lie flat on the sides of her head, in front of the ears.

Here they are in place.
Next, I made two odd-shaped sort of curvy pieces to cover the rest of the sides of her head.

Boom.
For your convenience, viewing pleasure, and possible use, I have made a scaled pattern of all the pieces I used. Please note that this pattern is for dolls with cat ears - if you want to make a mohawk for a human-eared doll, you will need to adjust the side pieces slightly.
 |
| Monster High Mohawk Pattern FOR DOLLS WITH CAT EARS |
In the last photo, you probably noticed the weird white patches on the hair. That was soaked-through superglue. To fix this, I just brushed out the excess glue with a stiff brush. I covered any remaining glue and patched up the holes in the wig with black acrylic paint.

Nice! The cool thing about this mohawk is that you can brush the hair forward or back or spike it up with your fingers, and it'll stay, no ironing or nasty gel required. Now that's what I call easy doll hair.
Here's the front view.

The only thing left on the list for this dolly was her faceup!
Here she is with pastels finished.
Pencils (the eyebrows are always the hardest part)...
...and she's finished, with paint and sealer!
I cooked up a sick outfit for her, with a black furry coat (trimmed with the same fur I used for her hair!), a grungy floral dress, and black heels.


No comments:
Post a Comment