Sunday, July 16, 2017

Repaint Story #5 -- Monster High Purrsephone -- AND How to Make a Monster High Mohawk!

Hi Magicians! Are your ready for another faceup?
That's right, I've got another Monster High doll finished!


This particular doll was a very worn Purrsephone.  Her hair was truly awful and her left lower arm and hand were missing and had been replaced with sparkly blue parts from an Abbey Bominable doll.
Her right hand was also missing, but I managed to find one that matched her in my parts bin.


Here she is post-wash.   Not much better.


The first step, of course, was to chop off her sticky, tangled hair and take off her face with 100% acetone nail polish remover.


Here's a closeup of the replaced hand.  To prep for painting, I sanded the bumpy glitter off and sprayed the hand and arm with matte sealer.


I also removed the white stripes on her body with nail polish remover.  However, the acetone slightly damaged the hard plastic, so I had to sand, seal and paint there as well.


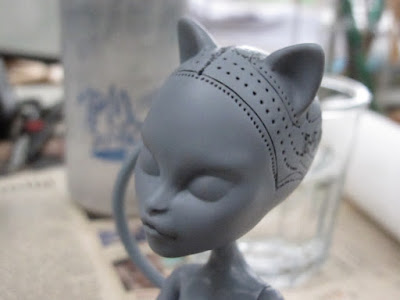
Next, I pulled out the leftover hair plugs from inside her head, and removed the black scalp paint.  She looks much better!
After some deliberation, I decided that Purrsephone should have an edgy, punky look, to contrast her sister, the more feminine Meowlody doll I posted about earlier.
And what's more punk than a mohawk?  I picked out some long, black, faux-fur fabric to play around with.


The first part, of course, is the long hair that goes down the middle of the head.  I cut a long strip of fur fabric with the fur running backwards, and made a point at one end for a widow's peak hairline.


Then, I just superglued it onto her head.  Perfect insta-mohawk, no gel required.


For the shorter, buzz-cut hair on the rest of her head, I used the same fabric, but cut the fur down shorter.
In order to work around her kitty ears, I first made two rectangles to lie flat on the sides of her head, in front of the ears.
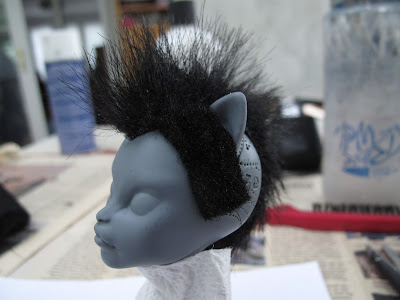


Here they are in place.


Next, I made two odd-shaped sort of curvy pieces to cover the rest of the sides of her head.


Boom.


For your convenience, viewing pleasure, and possible use, I have made a scaled pattern of all the pieces I used.  Please note that this pattern is for dolls with cat ears - if you want to make a mohawk for a human-eared doll, you will need to adjust the side pieces slightly.

Monster High Mohawk Pattern FOR DOLLS WITH CAT EARS


In the last photo, you probably noticed the weird white patches on the hair.  That was soaked-through superglue.  To fix this, I just brushed out the excess glue with a stiff brush.   I covered any remaining glue and patched up the holes in the wig with black acrylic paint.


Nice!  The cool thing about this mohawk is that you can brush the hair forward or back or spike it up with your fingers, and it'll stay, no ironing or nasty gel required.  Now that's what I call easy doll hair.


Here's the front view.


The only thing left on the list for this dolly was her faceup!

Here she is with pastels finished.


Pencils (the eyebrows are always the hardest part)...


...and she's finished, with paint and sealer!


I cooked up a sick outfit for her, with a black furry coat (trimmed with the same fur I used for her hair!), a grungy floral dress, and black heels.



Thanks for reading!  As always, stay tuned for more updates!  You can write to me at modelhorsemagic@gmail.com.

Repaint Story #4 -- Monster High Ghoulia -- Faceup of a faceup!

Hi Magicians!
This is yet another Monster High repaint story.
This Ghoulia doll was actually my second repaint ever!  But I didn't really like how she turned out at first.
This is her originally- she was in a used doll lot from Ebay and really dirty/sticky.


 It took some serious scrubbing to get her cleaned up!
Look how sparkly her makeup is O_o


As you saw, her hair was a mess, so after softening the vinyl with boiling water I took her head off...


...and gave her a haircut.

After that, her face and scalp paint came off with 100% acetone nail polish remover.

(I apologize for the dark photos - I was working at night.)


My first idea for her was a half-comedy, half-tragedy mask face, like the ones you see in old Greek mosaics.  So, I painted her head half black and half white.


Since this was my first reroot, I didn't want to be experimenting with expensive doll hair.  So, for the black half of her head, I used some cheap curly hair for cloth dolls from the craft store.  The package had just enough!
For the white half, I used hair from a platinum-blonde Halloween wig from Walmart.  I ended up regretting it though, because cheap wig hair is really nasty and it keeps poofing out and getting tangled.  Oh well, I learned my lesson.
At least she looks cool!


I protected her hair with tape and paper towels before painting.


This was my idea for the structure of the mask paint...


And here it is finished.
It looked okay, but I didn't have any Mister Super Clear sealant, so the face was really shiny and sticky and the acrylic paint kept cracking and getting hair stuck in it.  Basically, it was gross. (Plus, she looks kind of mean, even with the happy side!) So, a few months later, I decided to repaint her face again.

The mask comes off with more acetone.  You can also see how the generic sealant yellowed her vinyl face.  I had to correct it with MSC and grey pastels before I could paint.  Lesson learned!

With her hair wrappings on, she looked a little bit like Frodo from LOTR after he got wrapped up by the giant spider!


Blushing...


pencils...


....and paints!  Yay!  I decided to make the left half of her face look damaged, so I added a crack and paled the eye as if it had been injured.


I really think she looks so much better than she did, and I'm excited because I think I'm improving!


(or maybe it's just beginner's luck?)


Anyway, thank you for reading about her transformation!  As usual, I am indecisive about names.  I think Calysta might fit her; it's a Greek name that means "Beautiful" and it kind of goes with her original Greek drama identity.
As usual, you are welcome to share your ideas!  Hit me up at modelhorsemagic@gmail.com.

Saturday, July 15, 2017

Repaint Story #3 -- Monster High Bonita Femur & How to fix a broken neck peg!

Hi Magicians!

Are you ready for a big transformation story?  Let's go!

This poor dolly, a Monster High Bonita Femur, had been through a lot.  When I got her out of the box (a big doll lot from Ebay), her head had been squished down to her shoulders!   It turned out that the back of her neck peg had broken off, so her green head peg had come loose and was rattling around in there, and her head wouldn't stay up.  One of her antennae had broken off, her long hair was also really frizzy and tangled, and she was smudged with dirt.

It took me a while to get the head peg out.  I ended up having to use pliers.

While I was at it, I also washed all the dirt off her body and conditioned/combed her hair until it was nice and smooth.  Here's what she looked like after getting cleaned up.


Here you can see where the neck peg broke - the back just popped off, so the head peg fell out.  This was probably because of the strain put on the neck by her long, heavy hair.


I started out with some light modding.


I removed the other antenna...

...And also cut the foam bouffant out of her hair.  There was nothing wrong with it, but I didn't like the puffy look it gave to her ponytail.
Next, after priming her body with Mister Super Clear matte spray, I started to repaint it.  Confession: I don't like moths.  So my idea was to add a more realistic bony color to the skeletal upper body, and transform the mothy lower body from a furry texture to more of a leafy, flowery texture.


To repair the neck, I used Q-Bond reinforced superglue to glue the head peg back into the neck peg socket. This reduces head mobility, but was the only way to make a durable repair.  Besides, even intact Monster High dolls' heads can't really move up and down, so I didn't lose much.


Once the glue was dry, I used Apoxie sculpting medium to patch up the back of the ball joint so it was nice and round again...


...And painted it to match the original pink.  I faded a little pink onto her throat and spinal column to make the design feel more cohesive.


I dunked her head in boiling water to soften the vinyl, then worked it back on.

Much better!


Here's her body paint all finished!  I faded the pink out on her legs so I could leave her feet unpainted.  Monster High shoes are very tight, and I knew that if her feet were painted, it would rub right off!


I'm very proud of my detail work.  I darkened the insides of her ribs with drybrushing to add dimension...


...and shaded each individual leaf on her lower body.


I even painted the vertebrae on her lower back to match!


Time to redo her face.
Her original makeup was cute, but didn't really fit the Day of the Dead-skeleton-fairy vibe I was going for.


Off her face comes, with 100% acetone nail polish remover.


Before starting the faceup, I repainted her antennae with a pink and green fade, to resemble leaves.


Then, I hot-glued them back on her head, but in a different place: I put them on the sides, like ears.  I painted the glue to match her skin, and throughout the faceup process I used pink pastel to blend them in further.


I like her hair, so I protected it with fabric and tape.  Getting sealant on hair can turn it nasty and stiff.


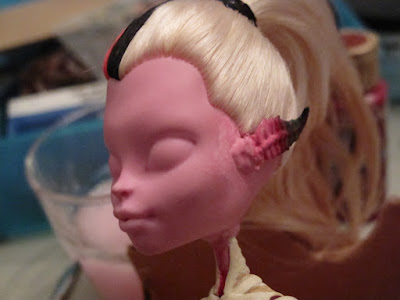
I did a rough sketch of my idea for her face.  I drew heavily on reference pictures of flower tattoos, gang tattoos, and traditional skull face paint for Day of the Dead.


Here she is after blushing, one layer of pencil, and a few layers of sealant.


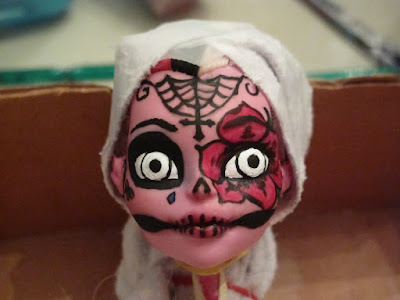
All the details are painted in black.  Looks like a coloring book!


The colors begin to appear.  At this stage, I noticed her left eye was a little crooked.  Derp!


In the next coloring stage, I fixed her eye.  Whew!
In keeping with the flower theme, I made her eyes chartreuse - a very bright shade of the same green I used for her lower legs and the flower's leaves.


Finally!  After cleaning up some edges, detailing her lip paint, and finishing the eyes, her face is finished!  I also added clear glossy sealant to her lips and eyes to make them shiny.


Here's a full body view.  I love how she turned out!


I was a little hesitant about the bright chartreuse for her eyes, but I'm glad I went with it now.  The contrasting colors really pop!
Oops!  I almost forgot!  She came with a big pair of black, pink, and neon-green wings.  Luckily, the clear green part matched her eyes, so I didn't have to change it.
I repainted the pink part to a darker pink/green fade to match her body.  I matched the skeletal part where it attaches to her back with the same bony color too.


I used some scrap lace and fabric to make her a quick outfit, too.

I really like the face paint.  She looks so festive!


Here she is with wings in place.
I think Mattel does a great job with body sculpting in general, but the details on Monster High dolls are just amazing.
As the final step, I repainted her little hair doodad (which was bright pink and orange) to match her color scheme.


All finished!  Bonita was part of a larger project batch, so more doll rescue and repaint stories will be coming soon.
I haven't thought of a new name for her yet, but suggestions are welcome at modelhorsemagic@gmail.com.  Stay weird, friends!