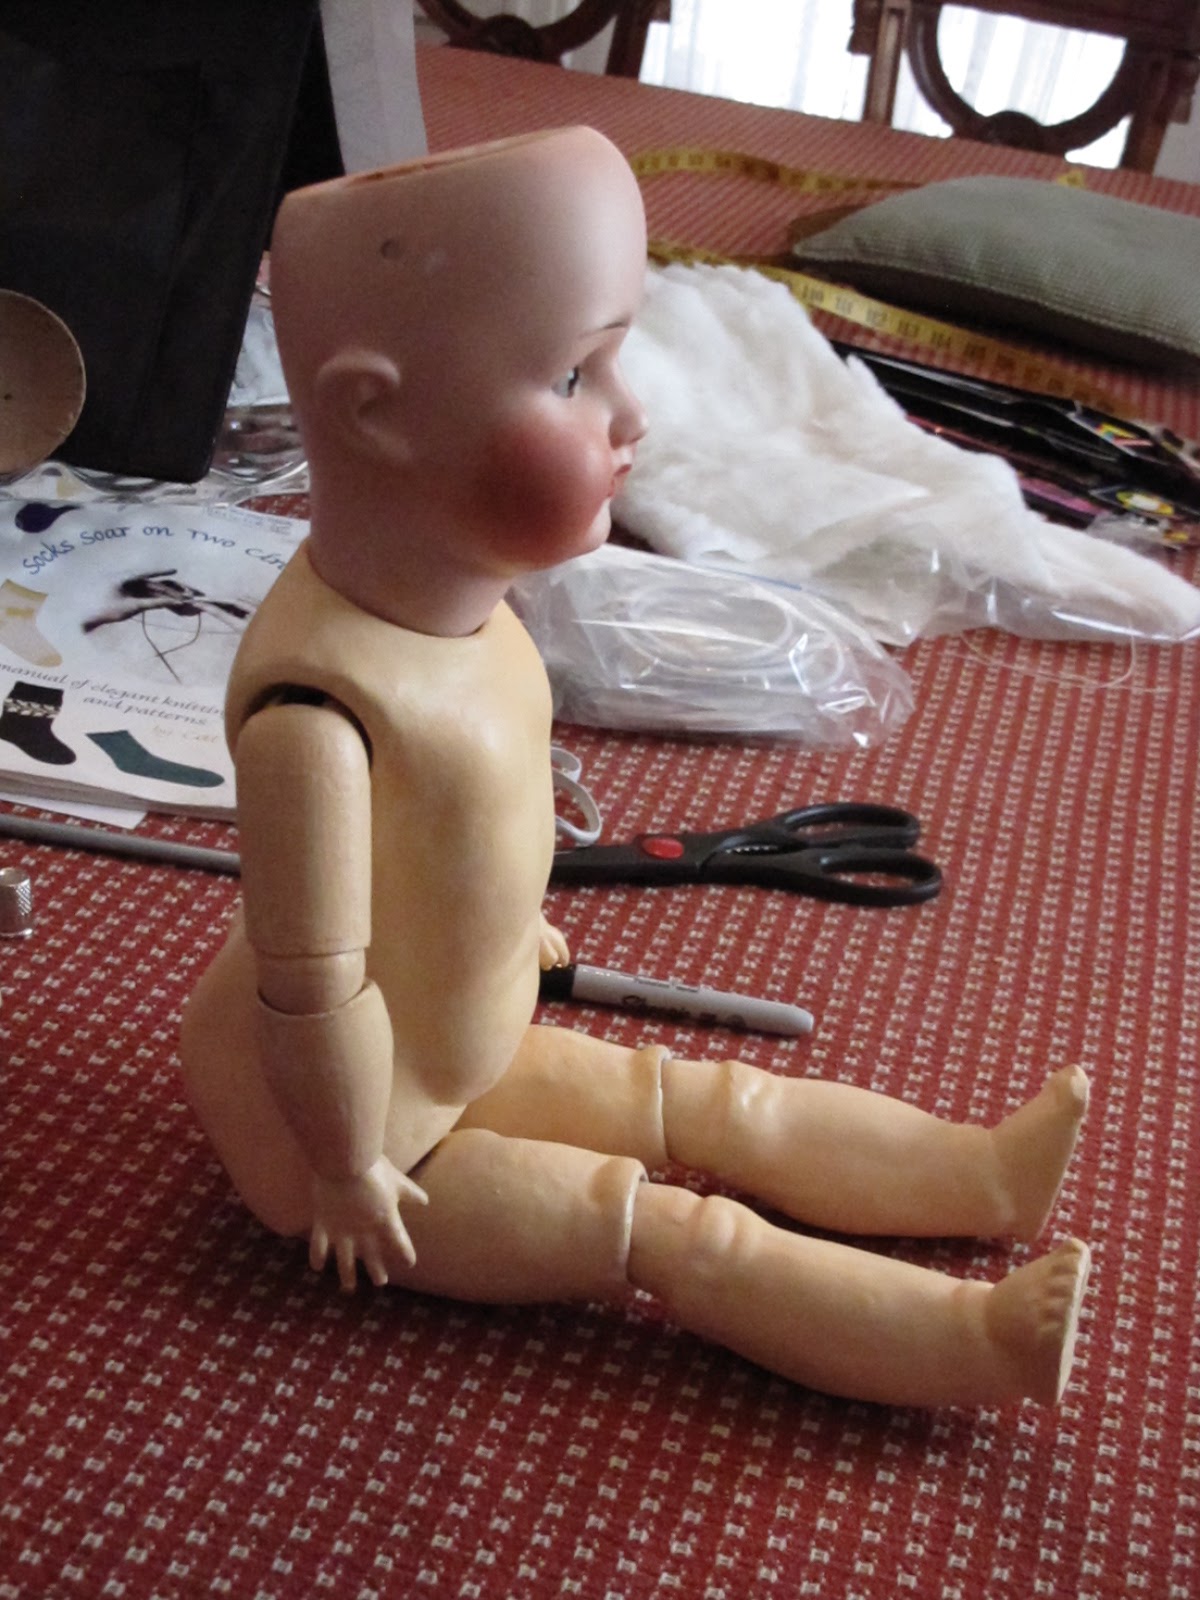
After I'd finished repainting her body and fixing her eyes, it was time for the final steps - restringing her and replacing her wig. This was arguably the most difficult part of the process, and required a good deal of patience.
Also, I would like to thank my awesome mom for being my handy-dandy helper during the restringing process. It really would have been impossible without her. So, tip number one: when restringing a doll, find a buddy. Your task will become infinitely easier.

I had originally planned to use the doll's original string, which was still inside of her. However, as soon as I tried to retension the arms, the loop broke! I realized that the string was very old and dried out, especially at the joins, and would not be useable.

From these photos, you can see how the crimping at the joins had led to weakness in the string.

This metal hook had also done some damage.

So, I had to remove the old string - but not all of it. There were loops of string built into the doll's lower legs that I would not have been able to take out without cracking open the legs. Luckily, these loops were still in good enough condition that I could use them.


I drew up a stringing diagram so you can see where the loops were. The red parts were fastened into the doll (or in the case of the neck plug and hook, held in by tension). The yellow line is the arm string, and the blue line was the legs/head string. The green dots are knots or stitches.
For a detailed description of the stringing process, keep reading!


Next, I strung the rest of the arm sections onto the string.

I used a trussing needle to get the string through the shoulder holes.

Then, I strung on the other arm.

Next, reaching into the wrist cavity with a permanent marker, I made a mark where the hook of the other hand would fall when the doll was strung.

I pulled the string back out to relieve tension. Here you can see how far it had stretched - when the string is relaxed, the mark for the wrist hook is only an inch from the shoulder joint of the opposite arm.

Next, I tied a knot right on top of the mark. I restrung the other arm, and, holding the string taut with the hemostat, slipped the hook of the left hand over the knot (which was inside the forearm). This is where my mom helped the most - she held the doll steady while I messed around with the string.

It took a few tries and a long time to get the right tension. When working with old dolls, it's important to remember that, while the string needs to be tight enough that the doll can be posed, the compo will crack if it's too tight. Here she is with arms complete.

The next step was to do the loop that holds on the legs and head. I passed a cord through her body, starting at one hip, looping through the neck hole, and passing back out through the other hip. This allowed me to find roughly where the neck plug would fall.

Next, I stuck the looped end through the hole in the neck plug, looped it through the bottom of the metal S-hook, and then pulled back down, so that the S-hook sunk into the neck plug hole and kept the string from pulling back down.
I pulled the string out of the body and strung it through the head, passing the ends through the pate opening and then through the neck, so that the neck plug at the top of the loop was pulled down into the head and settled back into the neck. Then, I put the ends of the loop back through the body and the hip holes.

Here's what she looked like.
 Next, I strung on the left thigh, and looped the string through the old loop attached to the lower left leg.
 I adjusted the string until the end was short enough, then I sewed the end of the string to itself tightly, securing the loop. The place where it goes through the lower leg loop is hidden inside the thigh, and the sewing took place at the hip joint.
I used heavy nylon upholstery thread and a short, sharp quilting needle, and made very strong, secure stitches, beginning and ending with a knot.

Next came the hardest part - tensioning. Having secured the left end of the string, I pulled on the still-loose right end. This drew up the slack in the left leg, body, and head. I had to pull extremely hard because the heavyweight elastic was resistant to stretching and the neck hook was also very tight.

I strung on the right leg pieces, looping the string through the old lower-leg loops like I had on the other side. Then, keeping the string as tight as possible, I sewed the loose end to the string. Again, kudos to Mom - she actually did a lot of the sewing.

Once the sewing was secure, I trimmed off the excess string...

...And here she is! Once the tension in the leg had been slightly released, the slack was drawn up and she was left perfectly strung!
Stringing was definitely the hardest step of restoration. I must stress the importance of having the proper tools and a good buddy.

And now, it was finally time for the wig. I had measured around her head and found that she was the perfect size to wear American Girl wigs (size 12-13). Accordingly, I had ordered a lovely, wavy auburn wig here. (Item # AD0008C) During restoration, a bust of Tennyson kindly kept the wig tangle-free.

I hot-glued her pate back on, making sure that it was firmly attached to her bisque head.

Next, I used some clear gel Tacky Glue...

...to make one big blob of glue in the middle of the pate. I spread it around with the nozzle of the bottle, then carefully put the wig in place, making sure that I liked the alignment of the part and hairline.

After the wig was on, I squeezed a thin line of glue under the edge all around her head.

Here's the wig in position.


As a final touch, I lightly spritzed the wig with water (protecting the doll with a towel) and combed it into bouncy curls like I did for Lucy (see my earlier post).
And here she is.
What a journey.


Restoring this doll taught me a lot. Technique-wise, I learned how to resculpt missing joints, refinish composition bodies, repair broken eye mechanisms, restring limbs, and reset wigs. But I also learned how to be patient and stick to a project even when it was hard.

Thank you for following her story. I will be making clothing for her later, and choosing a name. But for now, we are both going to take a rest!


