Monday, December 28, 2020

Doll Rescue #5 - GI Joe Restored after Dog Attack #3 - Replacing a Broken Hip Joint

 Hi Magicians!  

It's great to be back!  Since I'm on break from school for the holidays, I thought I should get back to work on some of my long-running projects.  This will be the third of the damaged G.I. Joe 12" action figures that I'll be repairing.

TW: This post contains some gnarly doll gore.  (Dare I say "as usual?")

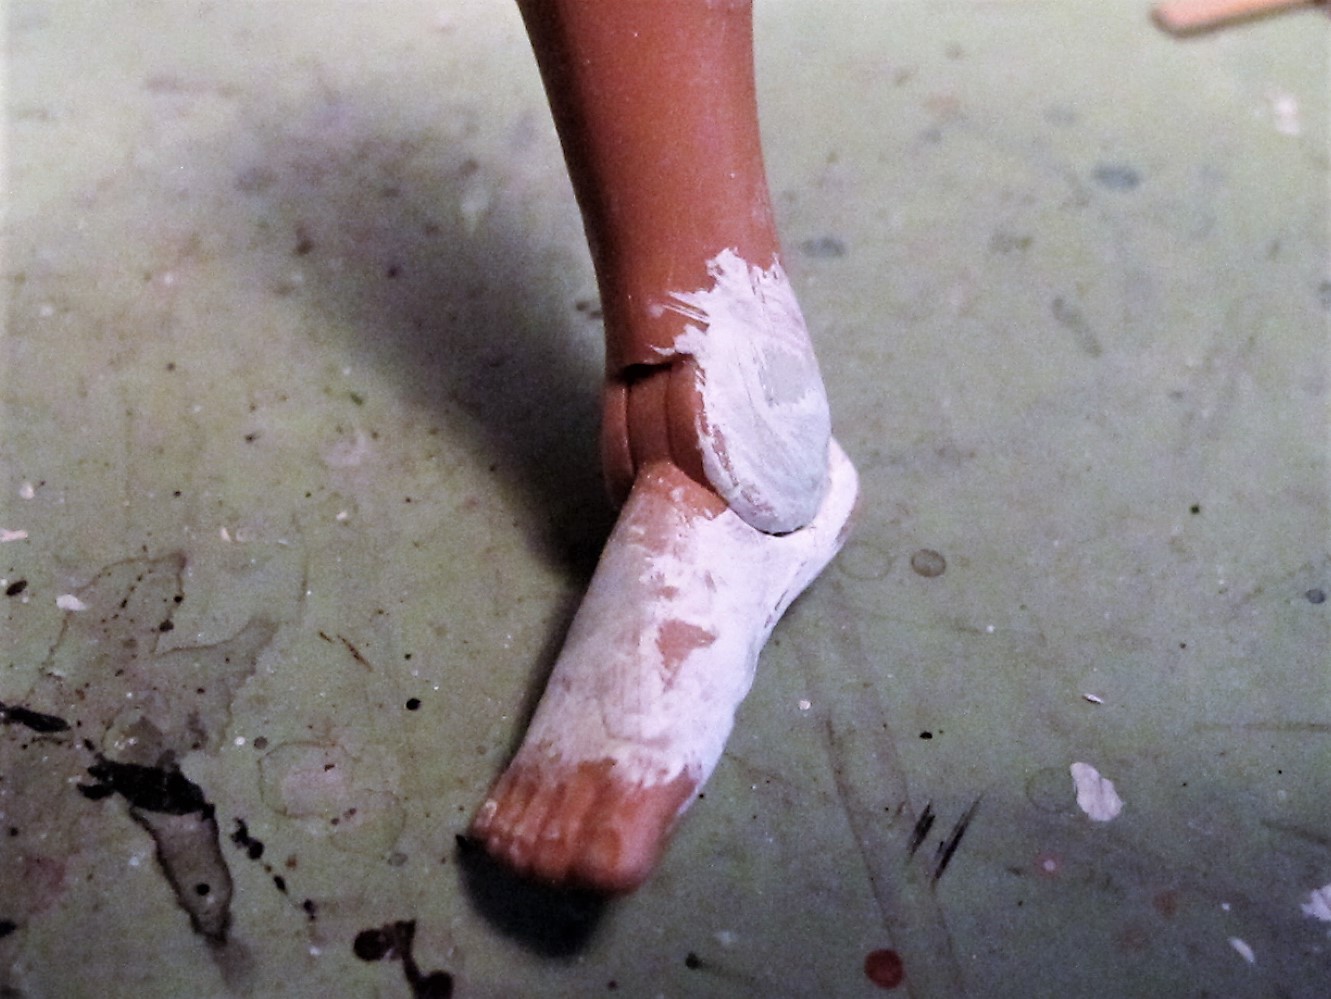
Unlike the two Joes I worked with before, this guy was only broken in one place.  His hip joint had snapped, and (luckily!) the broken-off leg was not lost.

The rotation disc for the hip was still trapped inside the body, but had slipped out of place.  And, because of how narrow the hip peg is, and how close to the leg it was broken, simply gluing the joint back together was out of the question.  

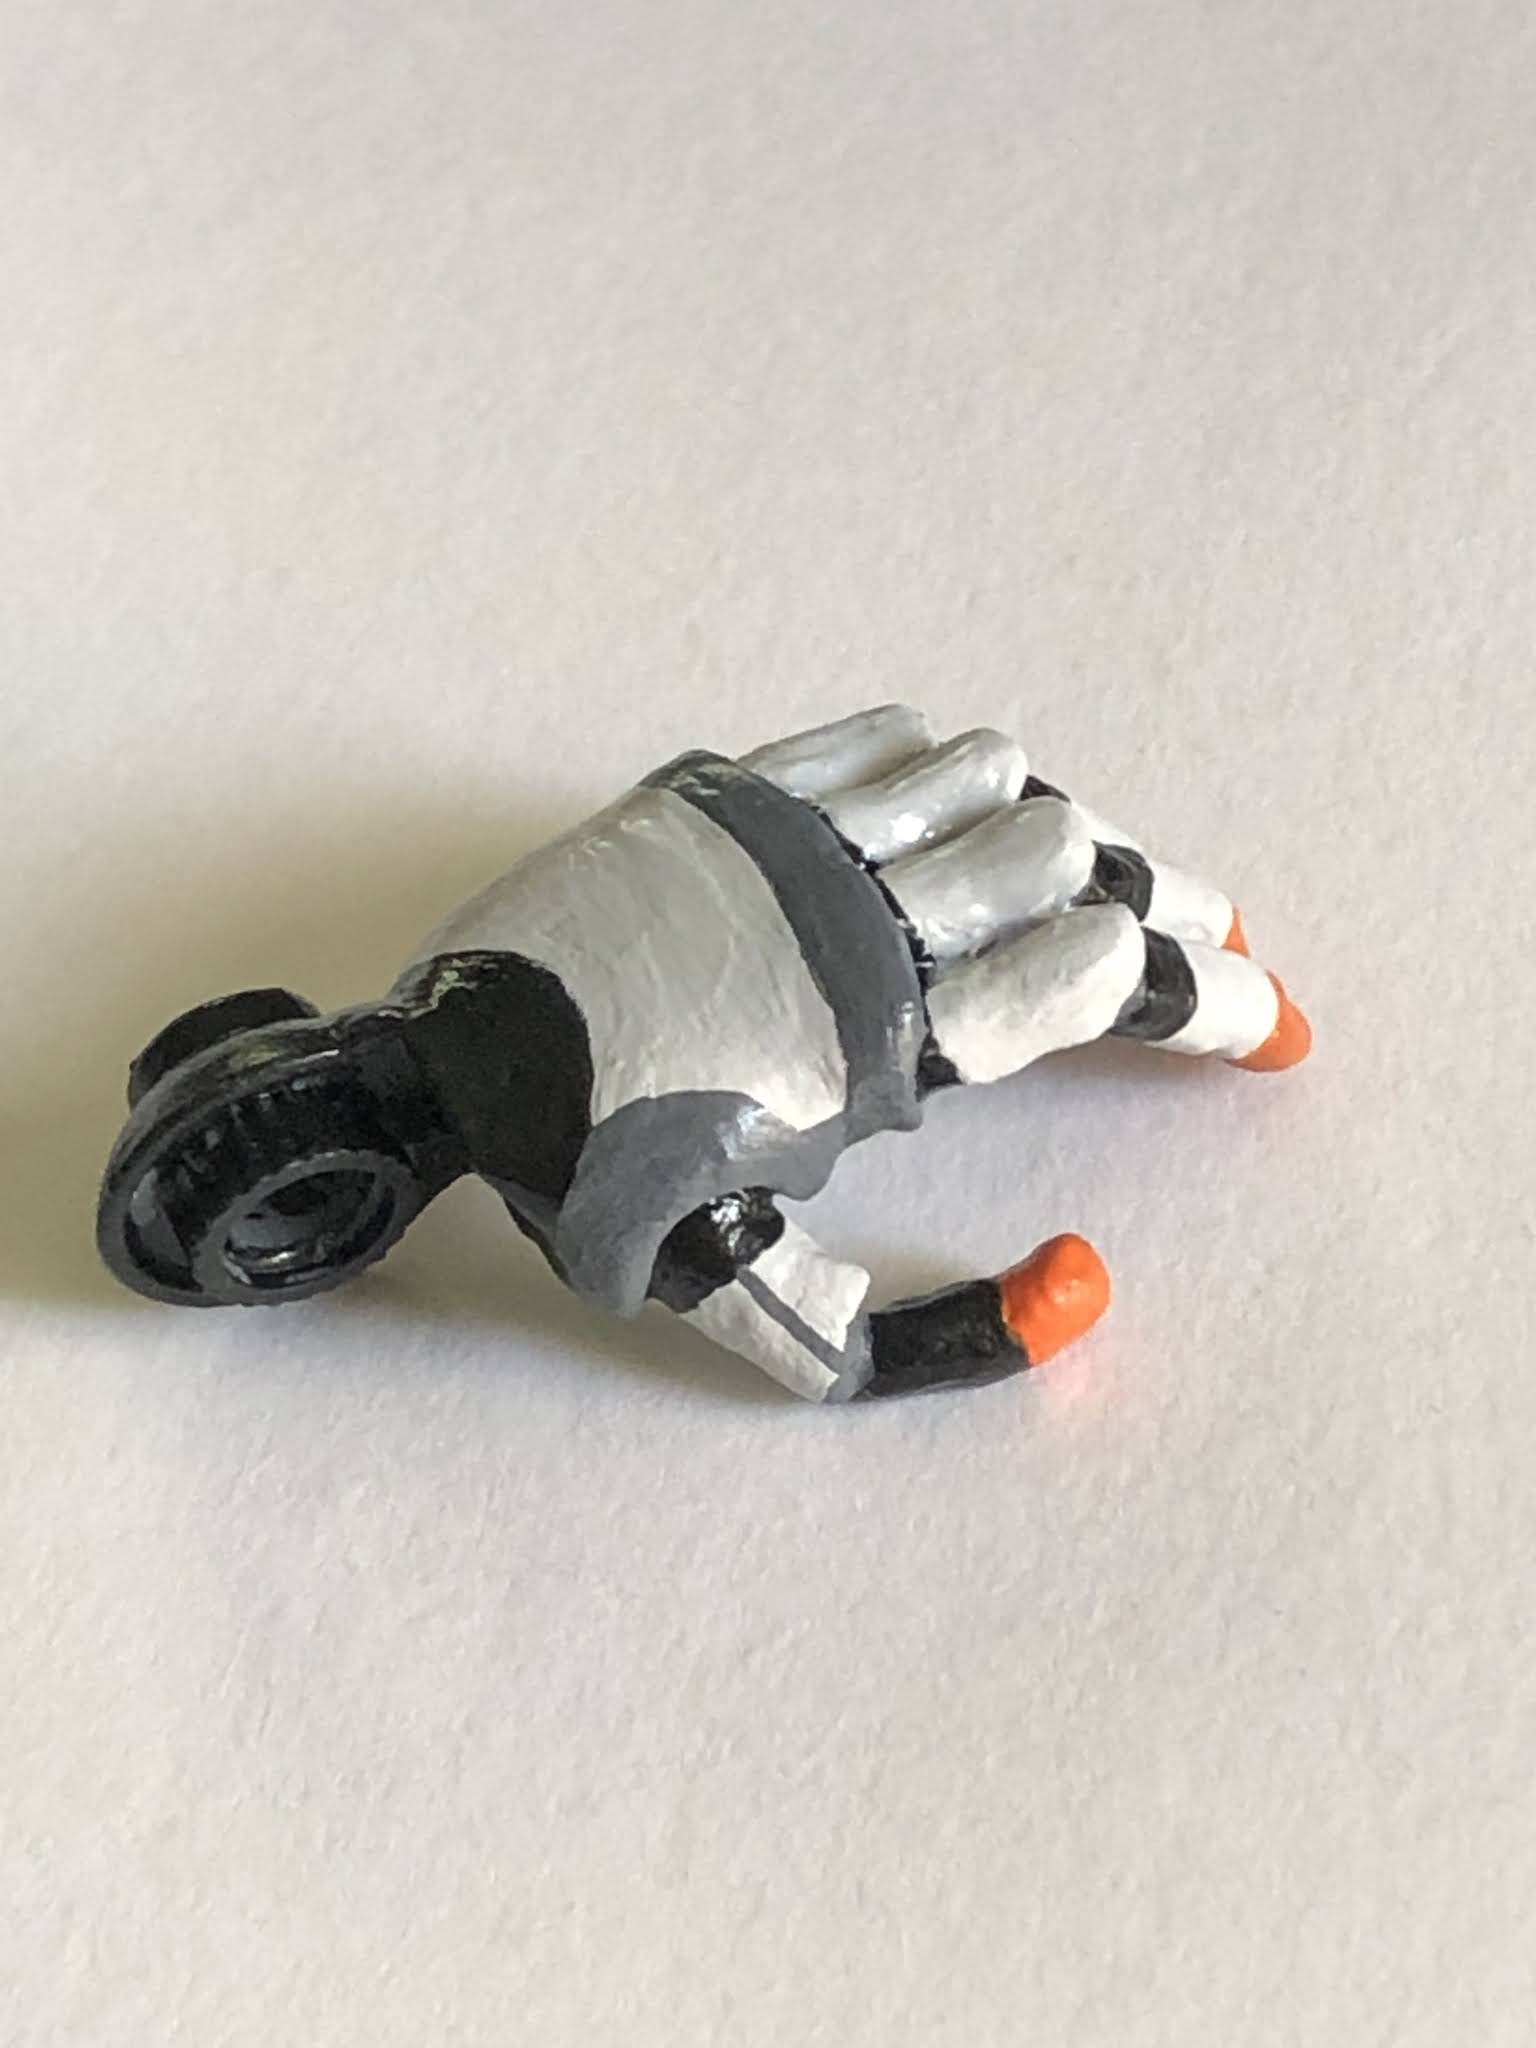
I decided to replace the joint with a three-part Lego assembly, with a rotating socket and spinning disc, to maintain a full range of motion at the hip (just like I did for the prosthetic wrist here.)
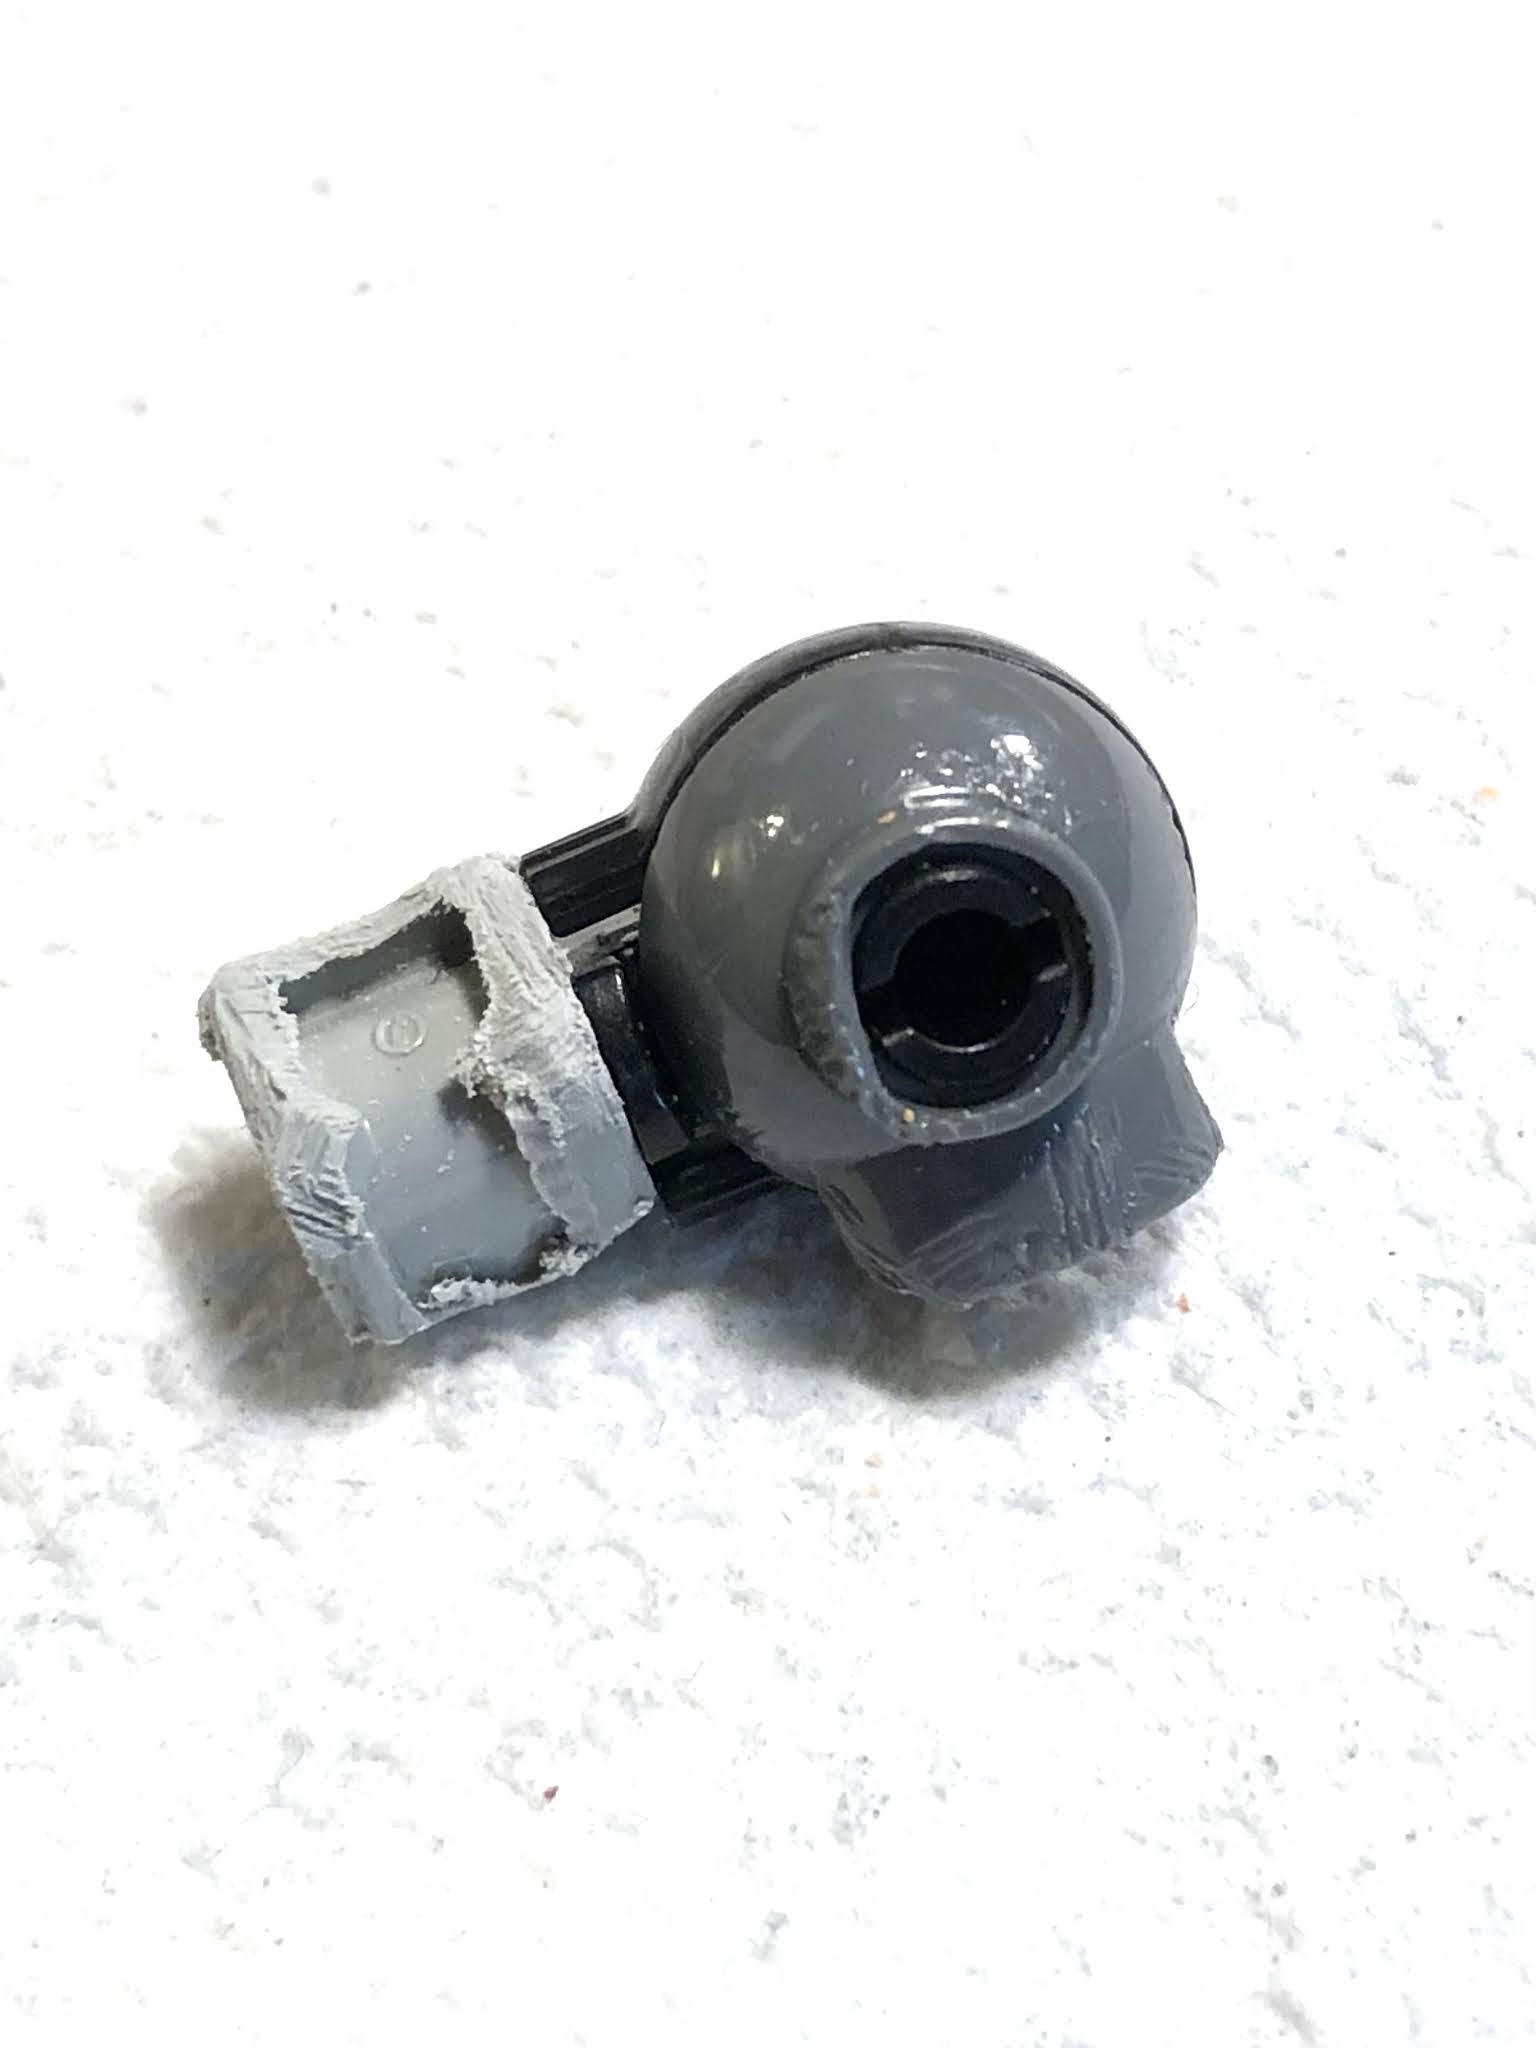
The grey half of the disc set had a very convenient manufacturing defect and was already missing the block underneath, so I didn't even have to grind it down.

The first step was to hollow out the head of the hip joint.  I used a Dremel Stylo to cut through the plastic:

...and pliers to help pull away the rubber surrounding the hard plastic of the joint.


The joint was sealed tightly into the leg and consisted of both hard plastic and rubber discs.  On action figures like this, the joints are incorporated into an extremely hard plastic core that runs through the entire limb segment, so they are very tough to remove!


I used a different bit on the Stylo (along with a craft knife) to finish hollowing out the hip socket.

I also hollowed out and enlarged the original socket on the body to make room for the Lego pieces, since the joint assembly was going to be a bit longer than the original:


Finally, I also ground down the Lego pieces as much as I could without damaging their range of motion.

Using hot glue, I attached the rotation socket onto the body...

...and the disc set into the hollowed-out hip, making sure to only glue the grey disc (so the black half can still rotate!)

Before the glue had fully set, I made sure the pieces still fit together and had not gotten clogged with glue.

Since the leg cannot rotate axially (in/out), I also had to make sure the foot was pointing forward and not skewed in or out when Joe tries to stand.


Because the joint still has two degrees of freedom, it can both bend forward (so he can sit) and open outwards, just like the original hip.


To strengthen the joint and help it look a little nicer, I used Apoxie Sculpt to build around it and smooth out the front:


I also did the same for the socket, so it won't pull out:

When the two pieces click together, you can't even really see the Lego pieces!

Adding the Apoxie also made the joint a tiny bit stiffer, so it stays in place and Joe can stand by himself - always a good thing.


Finally, I color-matched his skin with acrylic paint and gave each side of the joint a few coats.

Adding a matte acrylic spray sealer not only protects the paint, but also makes its texture more similar to the plastic, so it blends in quite well. 
Now that it's painted, you can hardly tell the joint has been replaced!  

The only other thing bothering me about Joe was his weird, neon-yellow hair and awkward beige lip color.

A trip to the acrylic-and-pastel salon has him looking a bit more natural.

And that's all!  I sewed a t-shirt for Joe (from my own pattern) and found him some pants and boots.
As I hoped, the full range of motion in the hip has been restored. He can stand, sit, and bend it just like the other side. 
This repair went way faster than I thought it would - including drying and curing time, it only took two days!  So I may actually have time to post again before I go back to school.

Thanks for reading!  As always, you can comment below this post or email me at modelhorsemagic@gmail.com.  And don't forget to check out my YouTube channel, Miniature_Magic, for unboxings, collection tours, DIY tutorials, and more.  I also have another blog, the Stablemates Model Workshop, where I focus more on model horses.

Bye Magicians!!
~Miniature_Magic

Wednesday, July 22, 2020

Doll Rescue #4 - GI Joe Restored after Dog Attack #2 - Prosthetic Hand and Leg

Hi Magicians!  
As promised, here is the second installation in the story of the dog-damaged GI Joes I bought a few months ago.  
TW: This post has some serious doll gore.  If you're squeamish, maybe skip this one!

Today's Joe fared somewhat worse than the last one.  Here he is:

He's taken damage in several places.  Most noticeably, his entire left leg was missing  below the knee.


His left hand was missing too:

His right hand has also been pretty badly chewed, with tooth marks and a missing thumb:


...and his left foot had some tooth marks as well:


The first step was to figure out that leg.  It was broken too high up for the joint to be salvageable, so I decided to replace the knee joint.  I used the same type of Lego piece that I used to repair Jen (remember her?):


I measured where to cut off a slice of the thigh so the length of the Lego piece would land the knee at the right spot, and I used a mini hacksaw to do the job.  (Hope you're not squeamish!)
(The hard plastic core in most action figure limbs means that you really do need a hacksaw to do stuff like this.)
I had used a Dremel to reduce the size of that big block on the end of the Lego piece.  This reduced the amount of leg I needed to cut off.  Then I hollowed out the sliced-off piece of thigh so I could fit the end of the Lego piece inside:

I used hot-glue to stick everything back together:

I also used an X-Acto knife and a sanding block to make the transition a little smoother.

I constructed his new prosthetic leg from piece of dried-out pens, another Lego joint, and some wire:

The shank is two pieces of sawed-off pen with a metal rod core.  I used floral wire to attach the end of the shank to that green Lego joint, which allows the foot to bend back (see the right).  The foot is made from two broken-off pen clips, which I bent, glued together, and sanded to look like a carbon fiber spring foot.

After I had the "guts" and articulation of the leg figured out, I tidied things up by surrounding the hot-glue and floral wire with a piece of recycled plastic packaging, covering the foot joint with a scrap piece of faux leather, and adding a spring from inside one of the pens to the shank to simulate a shock absorber:

I used a scrap of fake leather to create the socket, and used glossy black and silver enamels to paint the leg.


The left wrist joint likewise needed to be replaced.  I followed a similar process for measuring the cut distance:

This time, though, I added a third element to the Lego joint: this socket.
I wanted to preserve rotational motion in the wrist as well as flexion/extension, so I decided to sculpt a socket into the forearm so that the wrist piece could both spin and bend.  I marked where to cut the forearm so that (once the length of the socket was taken into account) the wrist joint would land at the correct position.

The Dremel came in handy again to trim the socket down to basically just the hole:
I sealed the end of the socket with a piece of plastic packaging (to keep glue from blocking it), then I hot-glued it onto the trimmed end of the forearm:
I used Apoxie Sculpt  to patch up the joint and incorporate the socket into the forearm:
I sanded and painted the resculpted portion:
I Dremeled down the other end of the Lego piece, and used some more Apoxie to start forming a hand around the plastic nub:
I sculpted in stages, letting it cure between so I could do more shaping with an X-Acto knife and sanding block: 


Because the wrist joint is so different from the other arm, and I wasn't going to be able to make it look natural, I decided to make this hand intentionally artificial looking.  So, this was my first-ever attempt to design a prosthetic hand for an action figure!
After a few more sculpting sessions, the hand really started to take shape:


After the final sanding, I planned out the paint job and used acrylics to give the hand some detail!


I also carved out the forearm a bit to create the ridge where the compression sock would meet the prosthetic socket:

I used acrylics to fix up the forearm and color the sock and socket:
And here's the completed hand!

The right hand was a lot less work.  I glued on a bit of wire for an armature:
Then, I resculpted the missing thumb and patched up the tooth marks:

I used white acrylic paint and some light sanding to smooth things out a bit more:
Then, I repainted it to match the arm:


Finally, the right foot got patched up in much the same way:


And he's complete!  (Like I did for Jen, I sewed some clothes for him too.)


I'm really happy with how all the repairs turned out!  You can hardly find the patches on the right side, and the left-side prosthetics are fully poseable.  Joe can even stand by himself again!

I haven't seen any tutorials for creating action figure prosthetics anywhere online, so if this helped you pull off a similar repair, I'd love to hear about it!

Thanks for reading!
As always, you can comment below this post or email me at modelhorsemagic@gmail.com.
And don't forget to check out my YouTube channel, Miniature_Magic, for unboxings, collection tours, DIY tutorials, and more.
Bye Magicians!

~Miniature_Magic